All Dressed Up and Nowhere to Go
This was the first year since I bought my coupe that it did not work out to go to Dorkfest. Leaving my wife with a 5 year-old, 3 year-old, and 4 month-old to go be dorky just didn’t seem very thoughtful. I was also unable to come up with an economical way to get us all out to California either. What’s a guy to do?
One of the perks of maintaining a site like this is that in my search for car listings, I often come across parts listings as well. I also make lots of great contacts allowing me to pick up parts off recently purchased or soon to be sold cars. Over the last few years, I had accumulated many of the parts I’ve always had my eye on including:
Suspension
- TC Kline Smart Design D/A Coilovers
- TC Kline Rear Shock Mounts
- Vorshlag Camber Plates
- Powerflex Rear Subframe Bushings (PFR5-311)
Brakes
- BMW Euro Floating Rotors (34112227737, 34112227738)
- HPS Brake Pads (HB135F.770, HB227F.630)
Drivetrain
Wheels
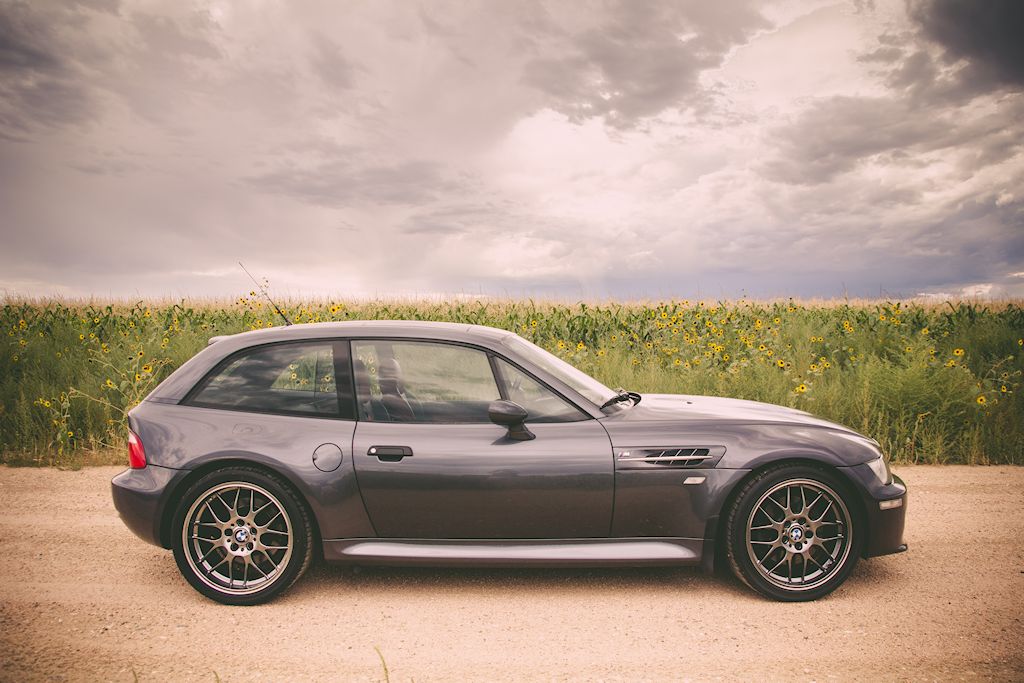
- BBS RGRs in Diamond Black
18″x8.5″ et38 front and 18″x10″ et25 rear
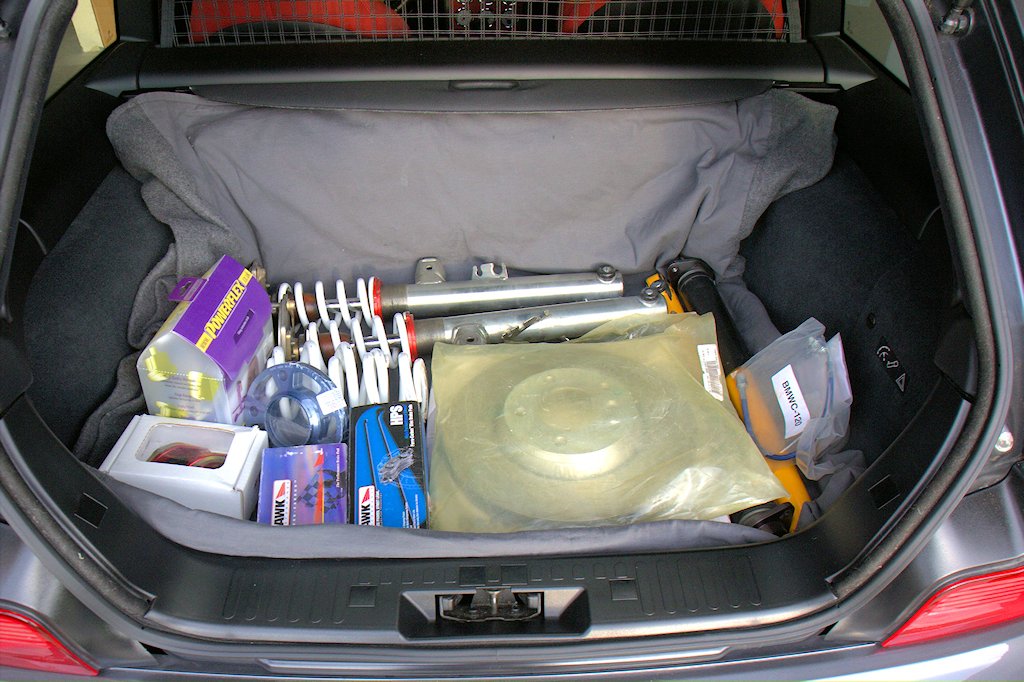
The problem was that I was so busy this spring and summer (new baby), I could never find a good time to install or get the parts installed. I also usually try to budget some Dorkfest money and was a little bummed to not be joining in the festivities. Enter Alex (you may know him as Cloudbase on Bimmerforums). He recently purchased a 4-post lift and was looking for side jobs to help justify it :-). I knew he had done most of these jobs before, and his attention to detail was equal to my own. I packed up my hatch (who says sports cars aren’t practical?), and headed down to his house. Needless to say, I am more than happy with his work and really enjoyed hanging out and dismantling the hatch trim too. All in all, it was a pretty good Dorkfest alternative.
The downside of doing so many modifications at once is that it’s hard to feel the individual differences. I’ll do my best to describe my thoughts on each below.
Suspension
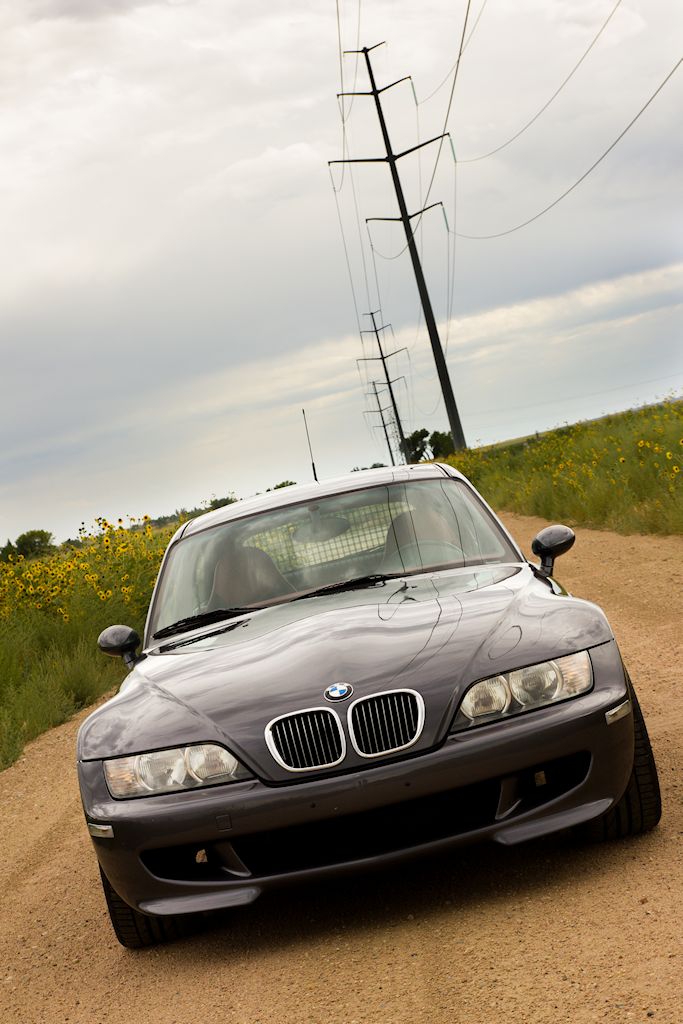
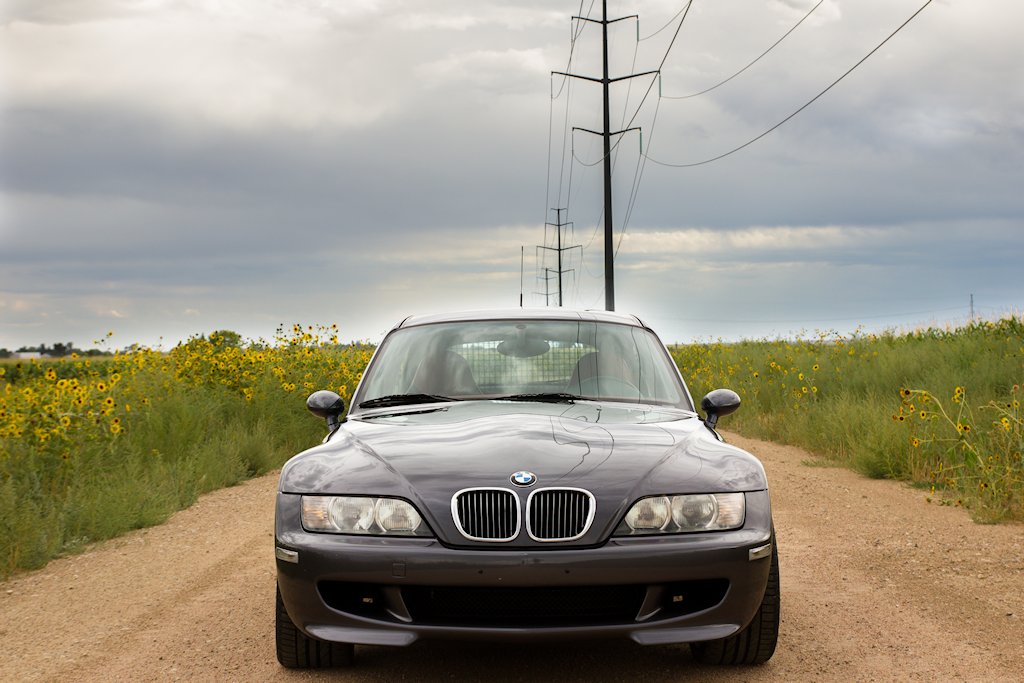
Back in the day, Jeremy Clarkson called the M Coupe’s handling “perfection”; and it truly is pretty unbelievable. But can perfection get any better? I now know the answer is yes!


TC Kline Smart Design D/A Coilovers
I always thought owners of these coilovers were exaggerating when I’d hear them say “they ride even better than stock”. How could dropping your car 1+ inches while firming up the struts and shocks make it ride even better? Well, I don’t know, but they really do. Even my wife noticed the difference in ride quality.
Also, in my opinion, the stock ride height of the M Coupes just looks way too high for my tastes. While I kept my ride height pretty conservative and more driving (rather than aesthetics) oriented, I still thing just the relatively subtle drop looks perfect and how it should have looked from the factory.
And finally handling, what the suspension is really all about on a sports car. Lets just say I have yet to meet the limits of these coilovers. Corners that I would previously start to lose traction on can now be taken significantly faster while sticking to the road. It’s almost uncanny. My first 5 minute test drive after getting the car back kept me smiling for a week.
I never thought I could love my coupe more, but I do. These are by far my favorite modification I’ve done thus far.
TC Kline Rear Shock Mounts
TC Kline’s rsms are built by Rogue Engineering who most agree make the best rear shock mount available. The TC Kline version is just prettier :-). It was almost a pity to cover them up with carpet.
Why replace them? First of all, the stock rsms have rubber bushings that are known to wear out and cause clunking sounds from the hatch area. Most importantly though is that the stock mounts require you to disassemble the entire hatch just to detach the rear shocks. It took Alex and I about an hour doing it together. Just to make sure I’ll never have to disassemble the hatch again, Alex cut small access holes above the rsms to allow shock adjustments in the future. The holes are covered by black plastics caps; most would never know it’s not stock.
Vorshlag Camber Plates
I read lots and lots of reviews before deciding to go with Vorshlag’s camber/caster plates. TC Kline and Ground Control also offer nice alternatives, but Vorshlag has a very long history of making reliable plates for E36 BMWs, and most agree they still have the best overall design. I have not tracked my coupe yet, nor do I plan to ever make it a regular occurrence, but I do appreciate the adjustability.
One thing to note, when you install any set of camber plates and remove the stock strut mounts, be sure to keep the stock strut tower reinforcements on top of the plates. I’ve come across a couple coupes that have cracked their front strut towers after removing the reinforcements. To get the full range of adjustability from the camber plates, you may need to trim the reinforcements a little depending on the design of your plates, but they’ll still be doing their job. Most agree having a strut tower bar also reinforces the strut towers and may be enough reinforcement. Better safe than sorry though. Alex even sanded an repainted my reinforcements while they were out of the car; that made my day.
Powerflex Subframe Bushings
Polyurethane subframe bushings may be one of the best and perhaps most important upgrades you can make to your coupe. Not only do they settle much of the tail wagging behavior that the stock rubber bushings allow, they’ll also help protect your rear subframe and differential mount (see here). I do kind of wish I could have experienced having subframe bushings before installing the coilovers to have a better idea of how much they contribute to the transformed handling, but I did not. From what I’ve heard from others, they may be just as important to my new found cornering ability.
Besides Powerflex, both Ireland Engineering and AKG make highly acclaimed subframe bushings for our coupes. I went with Powerflex due to a couple trusted recommendations and a great deal on Ebay. I don’t think you could go wrong with any of them though. Also, unless your car is just for track use, I’d go with the slightly softer street versions of any of these. I’ve heard the race versions are incredibly firm and can add some discomfort and noise in normal driving.
Brakes
BMW Euro Floating Rotors
The floating rotors were standard on M Coupes everywhere else in the world (including Canada). BMW USA worried about their durability here and opted for plain old single piece rotors. My brakes have always worked great, but it was obvious my coupe had been winter driven by the original owner, and they were just ugly. I figured it was probably about time to replace them anyway, so why not upgrade? No, I don’t really need more stopping power; nor do I need the extra fade resistance the 2-piece floating design provides. They just look so cool! The center hub is aluminum which saves weight, but also does not discolor with age like the stock cast iron ones. There’s also a big shiny “///M” logo embossed on the hub. If you order the rotors now however, you’ll receive the same rotors though I’ve heard the new batch is missing the “///M” logo. I know it’s fickle, but I waited until I came across an unused set on Craigslist and verified the presence of the “///M”. Yep, I guess I’m that guy. I still know they weren’t completely necessary, but they make me smile every time I see them through my wheels. Of note, their was only ever floating rotors in the front. The rest of the world shared the plain rear rotors.
Hawk HPS Brake Pads
With the rotor change, I figured it was probably time to change/upgrade my brake pads. I’ve heard great things about Hawk pads from many both for the street and the track. I was primarily looking for something with increased stopping power (don’t know why) and way less brake dust. The High-Performance Street (HPS) pads from Hawk fit the bill perfectly. They also offer a Performance Ceramic pad that has even less dust, but for some reason I felt like I wanted the extra performance of the HPSs. So far, I’m a fan. I haven’t really driven them aggressively enough to feel the performance difference, but they are definitely less dusty.
Drivetrain
Rogue Engineering Stainless Steel Clutch Line
This was not originally in my plan necessarily, but the guy I bought the rotors from threw it in for free. Score! I think Rogue Engineering makes great products, and if you haven’t noticed, it’s not the easiest to shift smoothly with these cars initially because of the clutch delay valve (CDV) BMW graced them with. This valve does exactly what it sounds like, it delays the action of the clutch in order to save the clutch from inept drivers. If you know how to drive manual, it really just slows your shifts and takes a soft touch to make them smooth (especially 1st to 2nd). Why not just remove the CDV? BMW thought of that and made it part of the stock clutch line itself. The only way to remove it is replace the line. The options are a stainless steel clutch line from a number of sellers or the OEM route is buying a stock, non-M Z3 clutch line which does not have the CDV built in. The Z3 has both the upside and downside of a rubber line in that it can expand with heat but is softer in feel. The stainless steel line does add a little bit of mechanical noise when shifting, but I already do not notice it anymore. The absence of the CDV was not really a night and day change for me like I thought it could be, but I sure notice the difference when I drive my dad’s coupe that still has it. Overall, I think it’s a worth while change.
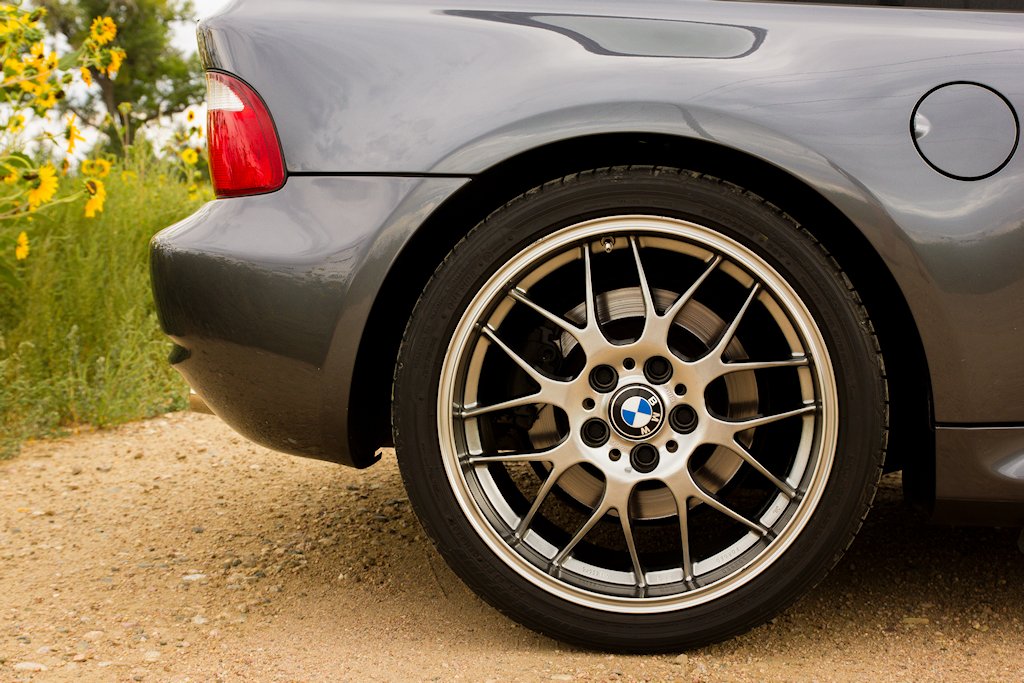
Wheels
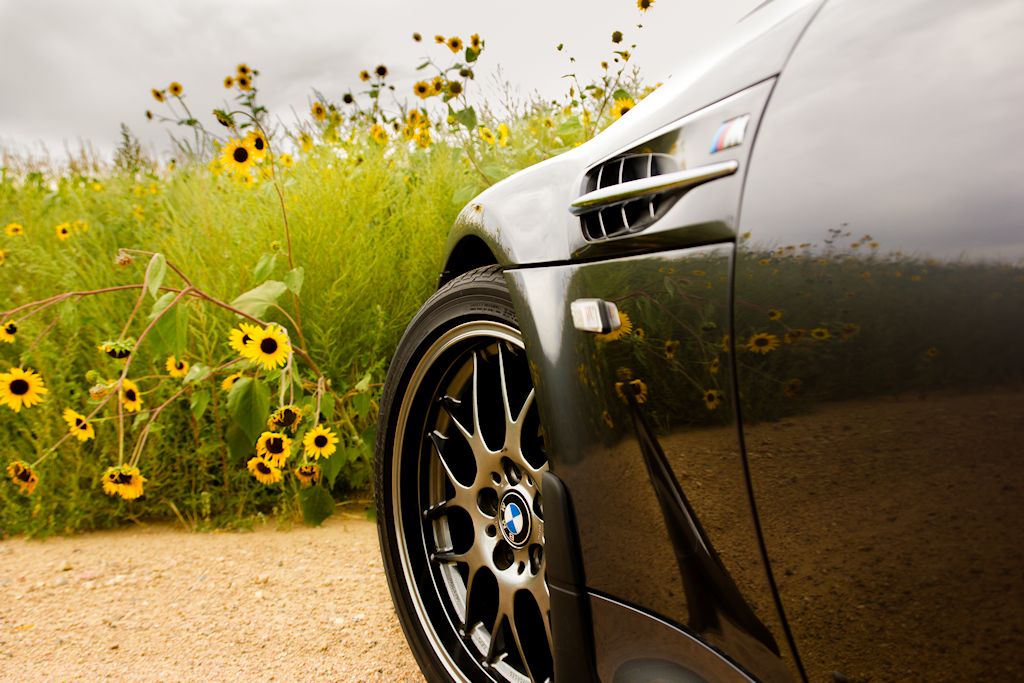
18″ BBS RGRs
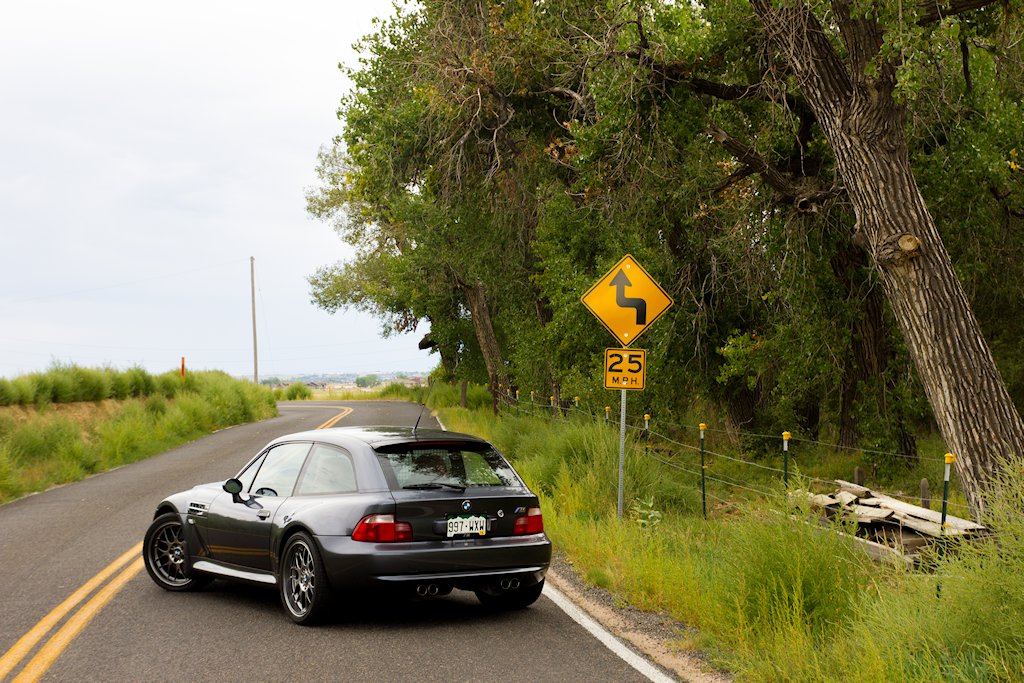
Now for the most obvious change on my coupe: the new wheels. Unless you have a serious track car or have more power than your tire size can handle, wheels are pretty much just jewelry. It’s fitting that the color of my wheels is called diamond black. I’ve always loved M Coupes with stepped-lip wheels, and that’s what I had planned to find someday. But BBS RGRs have always been my favorite wheels in general and diamond black my favorite BBS color. When I came across this set on Craigslist in Houston that came off of an M Roadster, it just seemed meant to be. That is until I emailed the seller, and he was only willing to sell locally with absolutely no shipping. That’s ok, I happened to have a good friend moving back to Fort Collins from Houston two weeks later. Yep, the stars were aligned, and my friend had room on his truck.
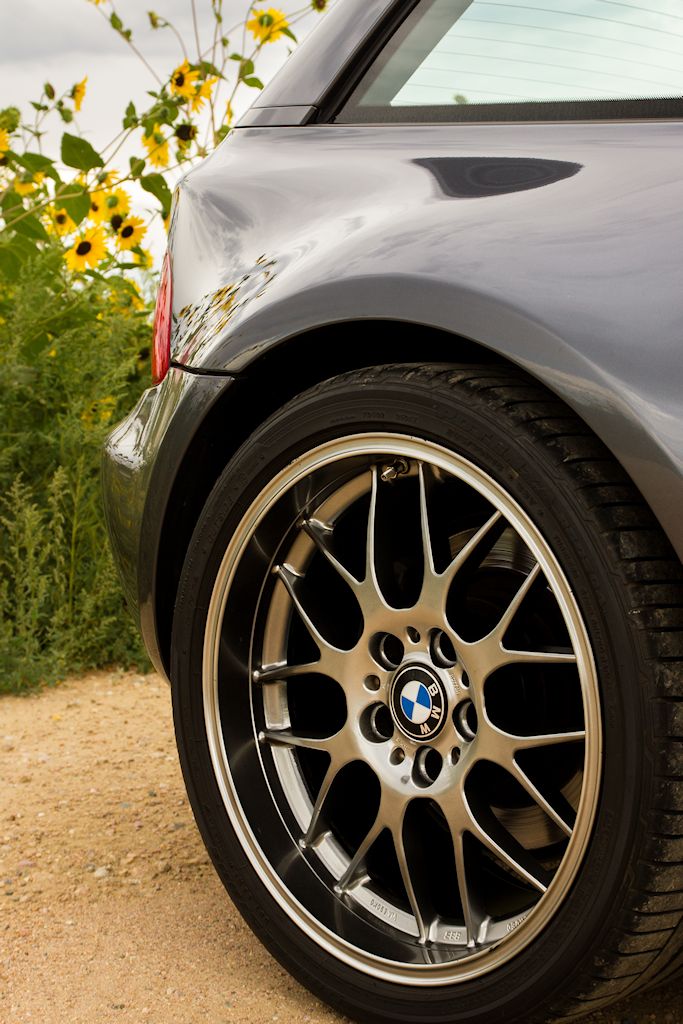 I think 18″ wheels are the sweet spot for wheels on M Coupes. Granted the right set of 19″ wheels can look amazing, but I’m not willing to give up the ride comfort with even lower profile tires. This set happened to be as close as BBS makes to correct fitment (actually for E46 M3s) in 8.5″ et38 front and 10″ et25 rear. The tires are 255/35-r18 front and 285/30-r18 rear. The front tires are probably slightly wide and did rub on the coilover height adjuster when I tried them on my dad’s coupe. His coupe sits almost an inch lower than mine though. They sure looked good on black sapphire though. They fit perfectly on my coupe with absolutely no rubbing. I had picked up a set of Rogue Engineering 10mm spacers to try to offset the look of some of the camber picked up when lowering a car on trailing arms, so I left those one. The stance seems just right to me now.
What is also crazy to me is that even with wider wheels and much wider tires, they were noticeably lighter than the stock roadstars. BBS lists them at 18.6 pounds front and 21.2 pounds rear which is roughly 5 pounds lighter per corner. I guess forged aluminum does make a difference :-).
To be honest, the RGRs look way better on my coupe than I thought they would. I’m still not sure if I like the diamond black on steel gray though. They looked a lot better on my dad’s black sapphire coupe and I can easily picture them on alpine white, imola red or estoril blue too. If I keep them, I’ll probably try to track down some red BBS center caps to replace the current BBS/BMW caps. We’ll see what happens.
Special thanks to my wife for having the photo skills in the family. JennEileen.com