Before I bought my first coupe, I had test driven several others here in California. At one point I was considering a 2001 Titanium Silver over Black sunroof delete (that ended up being sold to a gentleman from Canada I believe), and when I was reviewing the seller’s records, he had quite a bit of work done by a independent shop called Performance Technic. He had nothing but good things to say about them, and I remembered telling myself I’d check them out once I had a coupe of my own. You can get to know the owner, the technicians and their work here: http://performancetechnic.com
Once I finally bought my first coupe, it needed a new valve cover gasket, a valve adjustment and an oil change, so I made the 15 minute drive from San Ramon to Pleasanton to visit the guys at ‘PTech’. I’m not much of a DIY guy (something I’d like to remedy through the Project Coupe experience), so it was nice to know that the gentlemen at Performance Technic take a consultative approach with their customers. Every part and procedure was explained, and they took the time to show me around the shop to check out the other cars they were working on, even encouraging me to follow along as they performed their projects. They’re 100% focused on BMW’s, and it shows in their craftsmanship and enthusiasm for the cars they’re working on. It was great pulling into the shop to see the techs so excited to work on an M Coupe. You just don’t see that everywhere. Needless to say, their work was awesome at a good value, so I’m a happy returning customer.
Once I sold my original coupe, they were sad to see it go but I reassured them I’d be back in my next one. So they were thrilled when I dropped by in the project coupe to have them give it a once over.
As I noted in the first article, there were a handful of items that I noticed, but since I hadn’t performed a PPI, I wanted their professional opinion on what was going on under the hood. I scheduled an appointment for an initial inspection and to get the obvious items taken care of. Here’s what I already had in mind:
Inspection Light down to yellow
Oil Service Light on
Airbag light on
AC only working on high fan setting
The driver-side window button being elevated
Shifter handle pretty worn/slick & doesn’t light up
Glove box sagging
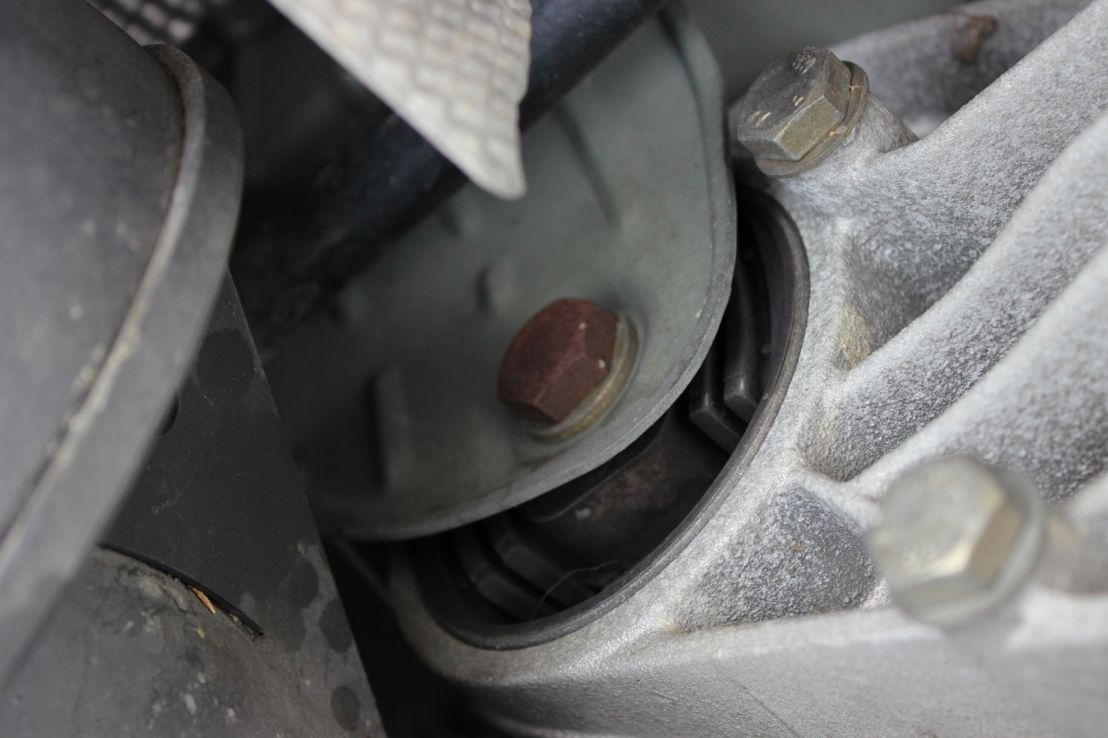
After getting the car up on the rack, I took out my DSLR and started shooting photos of the undercarriage…for your viewing pleasure. You can see that it looks insanely clean. Just as I would expect a 40k mile coupe to look.
After finalizing the inspection, they gave it a clean bill of health aside from the items mentioned above. No surprises! Rear shock mounts and subframe bushings were in good shape, tires are new, brakes have plenty of life left in them, cooling system and all belts are in proper working order, and best of all they confirmed the rear trunk floor and differential mount were in perfect shape. No sunken welds or tears in the U-shaped mount. Awesome!
The oil was drained out and replaced with OEM recommended 5w-30, along with a new oil filter. The rear differential fluid was also drained and replaced with Redline 75w-90 fluid. The final fluid to be flushed was the brake fluid, so they bled the lines and replaced with ATE DOT 4 brake fluid. All fresh and clean! I asked about replacing the transmission fluid, and they didn’t recommend it, so we left that alone. They, too, have heard good things about Amsoil, but would only recommend it to me if I planned on driving the car aggressively on the track or Autocross. Given that this will be given a new home soon, I opted to leave it stock for now.
As for the Air Conditioning/Heat fan only working on the highest setting, I did some searching and came across this excellent DIY: http://forums.bimmerforums.com/forum/showthread.php?632391-ac-fan-only-works-on-4-write-up-)
Fairly simple when it’s broken down step by step, with illustrated instructions! I did the simple thing first by blowing on it and cleaning it off with some WD-40, and voila the fan now works on all four speed settings. Done and done!

Now for the two trickier items to be addressed, the airbag light and the raised driver side window switch.
PTech pulled the code for the airbag light and it came back with the seat belt tensioner needing to be replaced, a quoted price north of $500. Ouch. I started doing a bit of research and discovered that this was quite common, with a possible solution coming by thoroughly cleaning the connectors underneath the seat, applying lithium grease to keep them clean, and then re-connecting them. I haven’t taken the time to remove the seats just yet, but will keep you posted on this progress, as I don’t intend to spend $500 to get a light to turn off.
As for the raised driver side window switch, it seems as if the previous owner did some DIY altering of this button and glued it in place so it’s permanently raised. The techs showed me that it wasn’t able to simply be pushed down, and that when downward force was added, the center trim piece would also bow downwards. So, without taking the whole center console apart, we could assume that the bottom portion of the button was somehow glued or otherwise connected to the underside of the trim plastic, neither of which NEEDED to be replaced, so this is being kept as is. The button works perfectly, and it’s actually kind of nice to reach down without looking and be able to feel the elevated button for eyes-free operation. What a feature!

Another small item to be addressed was the shift knob not lighting up. I removed the knob and saw that the two wires had been cut, eliminating the possibility of the knob lighting up. This could have been by design by the previous owner to eliminate the light, or there could have been a short caused by that light, solved by disconnecting the wires.
Either way, the shift knob was pretty slick and not in the best shape, so I decided to replace it altogether with the non-illuminated ZHP knob. Once it arrives from LeatherZ, I’ll share some photos of it installed. Should be a welcome improvement.
Finally, the all too common glove box sag. This is a simple DIY fix, and I’ve recently ordered the Glove Box Sag Fix Kit from eBay. You can find them here: http://www.ebay.com/usr/netlocksusa. Costs less than $35 shipped to your door, and I’ll gladly go into more detail once I’ve completed the fix myself.

All in all, not bad for a coupe that didn’t have a PPI done and didn’t have any service history aside from CarFax records. She’s now in perfect mechanical condition and ready to be beautified! Stay tuned for the next article covering the exterior paint, body and detail work!
Comments
4 responses to “LC60677 – Part 2: The Mechanicals”
Glove box fix has been completed! What a difference it makes.
Very nice! Sounds like you got a steal on it…I need to get my airbag light fixed too…I hope it’s not my tensioner! I noticed though one of the gauges is missing? The Volt meter? What happened to that?
The missing gauge is a long story. From what I’ve gathered, the middle gauge area was originally meant for a passenger seat airbag disable switch. Because of liability, that did not work out so they went with a voltmeter instead. When production started, VDO did not have enough voltmeters on hand so they shipped some cars with those blanks. The dealers or car buyers were supposed to bring them back to the dealer to have the voltmeter installed, when it became available. Apparently not everyone did. I’ve seen the gauge blank in a handful of cars over the years. It’s at least a nice metal piece.
Thanks for the information I found all very interesting please keep me informed as to the seatbelt situation have had also but have had it repaired , the gas accelerant needed replacement this is what I was told unfortunately it was not done by my normal Master Tech as I at another location !!