I can see! HIR Headlight Bulbs
I’ve talked to many a new coupe owner whose first thought on driving their recent purchase at night is, “I can’t see!”. It may be a little bit of an over-dramatization, but not far from the truth. My first thought was that I needed to do some headlight restoration (which could be the case for some as they are close to 10 years old now), but no, mine are completely clear and covered by clear Laminex. I admit I may be a little spoiled by the flame-throwing adaptive bi-xenons on our Audi A3, but I think the stock coupe headlights are even worse than those on my 1999 Nissan Sentra I bought in high school. It’s unfortunate BMW didn’t add the Xenon headlights from the E39 M5 or E46 M3 it had available in 2001, but such is life.
Thus began my quest for better headlights. With much research I basically came up with three possibilities:
- ProjectorZ / SONAR Projectors
These full headlight replacements can be purchased from Umnitza or off of Ebay from a variety of manufactures who all seem to start from the same basic headlight and do their own touches to them. As far as I could tell, for the most part, you get what you pay for with these with the more expensive ones having a higher customer satisfaction rating. I admit they do give the M Coupe a much more modern look with their optional halos and look great on many coupe colors (black especially), but I decided I wanted to maintain a more stock appearance and didn’t necessarily like the looks of them on steel gray. I’ve also heard many complaints about how impossible they are to get adjusted and aimed correctly. - HID Retrofits
There are several talented people around (and some coupe owners on Bimmerforums) that have successfully cut into their stock headlights and inserted Xenon projectors from another vehicle (usually an E46 M3 or Acura TSX). This was originally the most appealing option to me as it maintains close to stock appearance while upping the light output dramatically. It still may be something I look into down the line, but for now I was discouraged by the high price (about $800) because the process is so labor intensive, and the fear of messing up my electrical system with headlight ballasts that require far more power than the current bulbs do (also applies for the HID options on the projectors above). People have had success with them, but it’s a relatively new idea, and was not yet as “tried and true” as I’d like. If I were to do it, I’d probably try to find some other headlights to modify and keep my stock ones in case I ever change my mind down the road. - HIR (Halogen Infrared Reflecting) Bulbs
These bulbs were the result of a GE project to create a bulb with 75% the light output of an HID at 25% of the cost. While GE primarily stuck with the residential lighting market, they licensed the technology to Toshiba for automotive applications. “These bulbs attain light levels 75% to 110% brighter than stock as a result of an engineering process that deposits multiple, yet almost invisible, layers of semi-reflective coating on the surface of a specially shaped quartz bulb. This coating ( a titania/silica, zinc oxide/silica, zirconia/silica, silicon nitride/silica, and titania/magnesium fluoride tantalam/silica multi-layer dielectric, according to the patent) reflects a portion of the infrared energy emitted by the filament back onto the filament, causing it to glow brighter and emit more light from the uncoated forward portion of the bulb.” (FineMotoring.com)
At first glance the HIR bulbs appeared to be too good to be true with 75%+ more light at the same wattage. I eventually came across a June 2005 article from Roundel magazine entitled “Let There be Light’ discussing ways to improve the headlights of E36 3-series cars. They did a very in-depth comparison of the HIR bulbs versus aftermarket replacements including the popular Sylvania SilverStars (Read it Here). They proved to be the real deal.
One thing you will notice is that the HIR bulbs are 9011 and 9012 (high and low beam respectively) versus the stock 9005 and 9006. This concerned me at first, but they are the exact same size, shape, and wattage as the stock bulbs. The only thing you need to do to make them fit is trim the center tab on the mounting flange (more details below).
Philips now makes a version of the bulbs too. After some research and recommendations I decided I wanted the original Toshibas.
Purchase
As with everything I buy, I then searched high and low for the best price. Most retailers I came across, including Amazon, only carry the newer Philips bulbs. About the only place I could find the Toshibas HIR bulbs was FineMotoring.com which is where most of my information came from anyway, so I was more than happy to support them. They have a very fair price of $32.55 per bulb shipped or all four for $106.20 shipped. You can choose either Toshiba or Philips at that price. At the time, it also happened to be the cheapest source I could find. The site owner, Max Lumens (great name for a headlight bulb seller), also gave the slight edge to the Toshibas, so I took his recommendation. They are pretty expensive for headlight bulbs, but the difference is well worth it.
Side Note: I noticed Amazon currently has the Philips HIR bulbs very on sale at $21.02 for low beams and $18.39 for high beams with free shipping. If you want the Toshibas or want to support a small enthusiast business go with Max (hirbulbs@finemotoring.com).
Installation
To be honest, it took me quite a while to get around to the installation – at no fault to the bulbs. When I realized it required the removal (or loosening) of both the airbox and wiper fluid reservoir (at least on an S54 M Coupe) I kind of procrastinated until I had a better grasp of what that entailed. I of course forgive BMW for jamming such a large engine into such a small space that the back of the headlights can’t be easily reached. I’m not a mechanical newbie, but I am still a little hesitant to take things apart on my “baby”. Hopefully this will simplify the process for others like me.
Step 1 – Bulb Trimmnig
The first step, as mentioned above, is to trim the center tab on the mounting flange of each new bulb. Basically you need the little tabs around the edges to fit properly into the lamp socket so that you can twist it into place. I dug some toe nail clippers out of the bottom of my wife’s drawer, and they worked liked a charm. A very detailed and photographed explanation can be found here. If you buy them from Max, he makes it very easy by painting the small sections you need to trim off with white nail polish. He cannot legally trim them himself before selling them. I unfortunately forgot to photograph my painted bulbs before trimming, but it’s just a small section off of only one of the 3 tabs on each bulb. I recommend leaving the bulb in it’s foam shipping tube to do this as the bulb glass should never be touched by bare hands if you want it to work as well and as long as it should.
Step 2 – Passenger Side
Next you need to remove the old bulbs (after gaining access to them). Some of this should apply to S52 M Coupes as well, but my experience and photos will deal mainly with my S54. I’ve heard the S52 coupes have easier access to the driver side though.
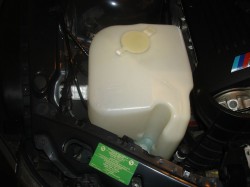
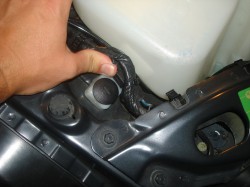
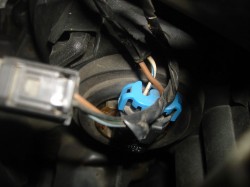
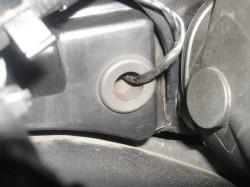
First the easy side (passenger side). If you have small hands, you may be able to contort them enough to avoid moving the washer fluid reservoir, but I could not. There’s just one large plastic nut holding the washer fluid reservoir into place. It’s hidden behind some wires that you can move far enough out of the way to get a screw driver behind them. Once removed, the washer fluid reservoir can be slid up and towards the side of the car (the bottom of it slips into a little pocket along the sheet metal). Once the headlight sockets are exposed, you’ll see the low-beam towards the outside of the car and the high-beam towards the inside. When locked in place, the tail of the high beam should face down and the low beam face up. Turn both 90 degrees clockwise to unlock then pull them straight out to remove. The bulbs are attached to the wires with small clips that pop off easily
Step 3 – Driver Side
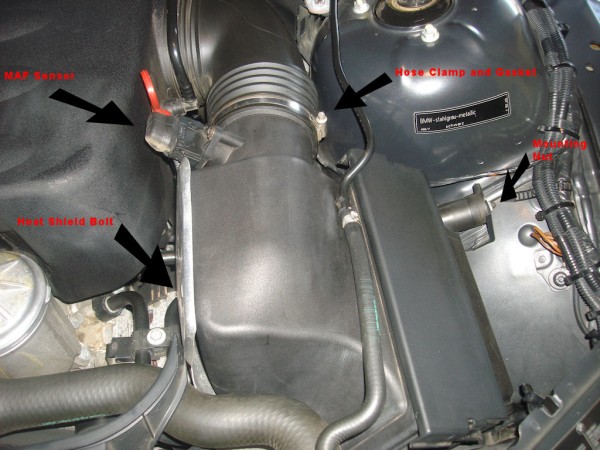
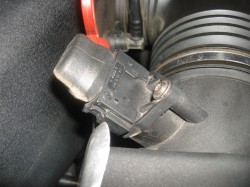
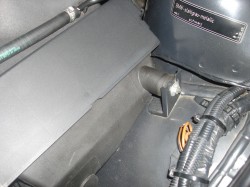
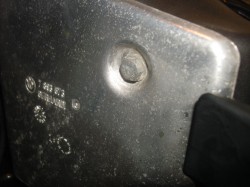
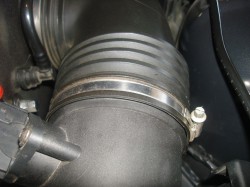
Now to the driver-side and the removal of the airbox. It’s actually much easier than I initially made it out to be. The first step is to detach the MAF sensor. (be sure not to start the car when it is detached or you’ll get a check engine light). It removes by squeezing the plastic tabs on either side and pulling straight off. Next pop out the hose from the clip on top of the airbox. It’s a rubber hose, so there’s plenty of give to get it out of the way without detaching the ends of it. Now you can loosen the 10mm mounting nut on the right side of the airbox and the 10mm bolt holding it to the metal heat shield on the left side. Finally, use a screw driver to loosen the hose clamp then slide the airbox out of the rubber gasket (it’s easier if you use the screwdriver to gently break the seal between the gasket and airbox). Now it will be completely free, and you’ll be able to access the back of the headlights. On the driver side, each bulb has a plastic cover with the wiring running through it. These just slide into place and are easily removable. You can then remove the bulbs by turning them clockwise.
Step 4
Once you have the old bulbs out, simply attach the new bulbs to the wires. Place them in the sockets 90 degrees counter-clockwise from their final position (high beam with the tail to the right, and low beams with the tails to the left) and twist 1/4 turn to lock them in. Replace the plastic covers on the driver side.
Initial Impressions
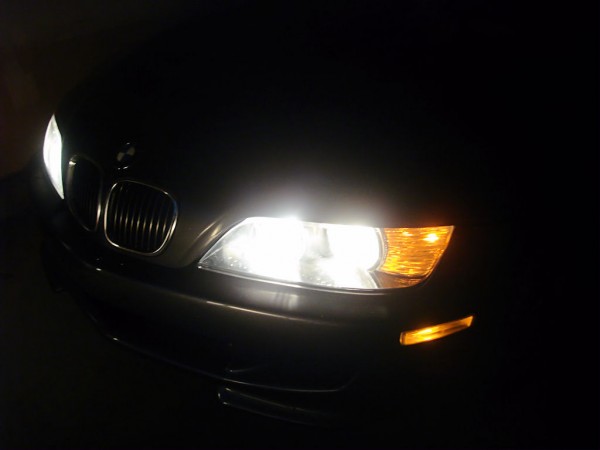
It was actually almost a week before I had a chance to get the coupe out at night. I forgot about the bulbs for the first couple miles of well lit streets. On the way home I took an unlit back road and thought, “I haven’t complained about my headlights yet tonight”. I then realized I no longer had anything to complain about. To be honest, they still do not compare to my Audi’s xenons, but I’d say their closer in light output to them than they are to the stock bulbs. The light is also much less yellow and almost completely white (not blue tinted either). For the first time driving at night in my coupe I thought, “I can see!”. The true test will come next week when I drive 1200 miles to California.
Update: I’ve heard these may not be setup for running at 30% intensity for day time running lights. If you live in Canada or have the DRL module added to your car, they may not be the best option as it sounds like they burn out a lot faster in that circumstance.

